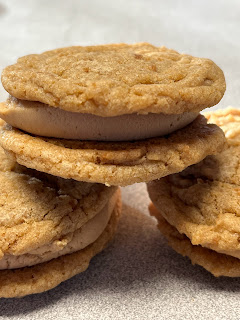
April 10, 2024

Sheet Pan Fudge Brownies


SHEET PAN FUDGY CHOCOLATE BROWNIES
yield: 40 BROWNIES (MORE OR LESS DEPENDING ON SIZE)
prep time: 15 MINUTES MINS
cook time: 30  MINUTES MINS
total time: 45MINUTES MINS

INGREDIENTS
3 sticks salted butter, (24 tablespoons)
1 pound bittersweet or semisweet chocolate, chopped
½ cups granulated sugar
1 cup light brown sugar
5 large eggs
1- ½ TBS vanilla extract
1- ⅓ cups all-purpose flour
½ TBS baking powder
½ tsp salt
1 to 2 cups semisweet chocolate chips

INSTRUCTIONS

1. Preheat the oven to 350 degrees F. Lightly grease a large, rimmed baking sheet (12X18-inches) and set aside.

2. In a large microwave-safe bowl, combine the butter and chocolate; microwave in 1-minute intervals, stirring in between, until the mixture is melted and smooth (don't overheat, it should be slightly warm, if at all). Add the sugar and stir until combined.

3. Whisk in the eggs and vanilla, and mix until large bubbles pop at the surface - it will go from looking slightly curdled to really glossy and thick so keep stirring until you see the change. In a separate smaller bowl, whisk together the flour, baking powder, and salt. Add the dry ingredients to the batter and mix once or twice. With dry streaks remaining, add the chocolate chips and mix until well-combined.
Spread the batter evenly in the prepared pan.

4. Bake for 25-30 minutes until edges are set but the middle is still slightly gooey. If you want extra dense, fudgy brownies, halfway through the baking time, carefully lift up the baking pan and let it drop on the oven rack to release any air bubbles (totally optional). Let the brownies cool completely in the pan (I like to refrigerate them after they have baked and cooled - easier cutting and ultra-delicious, they are incredible straight from the freezer).

 from Mel's Kitchen Cafe

April 3, 2024

Chocolate Sugar Cookies


1 cup butter, room temperature
3/4 cup granulated sugar
3/4 cup brown sugar
2 eggs
1- 1/2 TBS vanilla
3- 1/2 cups flour
3/4 cup cocoa
1- 1/2 tsp baking soda
3/4 tsp salt
1-1/2 tsp cornstarch
1 batch Chocolate Buttercream Frosting


Instructions

1. Preheat oven to 350° F.

2. In the bowl of a stand mixer, cream the butter and sugars together for 2-3 minutes or until light in color and fluffy.

3.  Scrape the sides of the bowl and then add in the eggs and vanilla. Mix until combined.

4. Add the flour, cocoa, soda, salt and cornstarch and mix together. Start mixing slowly, gaining speed as the flour incorporates. Mix until the dough has come together. The dough should be easy to work with and Play-Doh like consistency.If it is very stiff, add a little water, if it is too soft add in a little flour until you get Play-Doh like consistency.

5. Roll the dough out on a floured surface. Roll to about 1/4-1/2 inch thick.
Use a cookie cutter to cut the cookies out.

6. Transfer the cookies to a parchment paper lined cookie sheet.
Bake at 350° for 6-8 minutes or until the cookies are puffy and no longer glossy.

7. Let the cookies rest on the hot cookie sheet for 5 minutes before transferring the a metal cooling rack.
Frost, if desired and serve. Will keep in an airtight container at room temperature for up to 3 days.

From Cooking with Karli

March 20, 2024

Big Giant Chocolate Sandwich Cookie (Oreo)


INGREDIENTS

Cookies
15.2 oz box devil’s food cake mix (like Duncan Hines)
1/2 cup real butter, softened (butter flavored shortening or oil also works)
2 eggs

Buttercream Frosting
1/2 cup real butter
2 cups powdered sugar
1 tsp vanilla
generous pinch salt
1 or more tablespoons milk, or enough to reach desired consistency

Cream Cheese Frosting
3 oz cream cheese
2 TBS butter
2 cups powdered sugar
one pinch salt
1 or more tablespoons milk, or enough to reach desired consistency

INSTRUCTIONS

1. Preheat oven to 350 degrees F. Tip: After your oven signals it’s pre-heated, wait an extra 10-15 minutes if possible before placing food in.

2. Combine butter and eggs with dry cake mix (ignore all instructions on box) with a hand mixer or stand mixer until a cohesive dough forms. *Butter should be very soft, it’s even okay if you soften in the microwave and it’s just a bit melted.

3. Divide dough into 2 equal parts- I recommend a food scale to accurately divide.
Form each portion of dough into a round ball and place it on a baking sheet Pat dough evenly into circle shape.  You want a 6″ circle. *You are making 2 cookies. If you have a jumbo baking sheet you might be able to fit them both on, otherwise, use 2 separate cookie sheets or bake one and then bake the other.

4. Bake each cookie for 12-15 minutes. You’ll be looking for cracking on the edges and moving into the center of the cookie. This is a good signal the cookie is ready. Remove pan from oven and let cool on the counter until cool enough to touch. Slide parchment onto a cooling rack. Wait until cookie is completely cool before filling.

5. To prepare filling, choose buttercream or cream cheese icing and beat all ingredients until smooth. Add milk one teaspoon at a time until frosting is fluffy and soft as desired.


 from Our Best Bites

March 18, 2024

Slow Cooker Mexican Beef


Shredded Beef:

2-3 pound boneless chuck or sirloin beef roast
2 cups low-sodium beef broth
2 TBS apple cider vinegar
1 cup salsa (green or red salsa)
1 tsp ground cumin
1 tsp chili powder
1 tsp onion powder
1 tsp garlic powder
1 tsp salt
½ tsp pepper
2 TBS cornstarch or flour


Enchiladas:
10 6 or 7-inch flour or corn tortillas
1 cup shredded sharp cheddar cheese
1 ½ cups shredded Monterey Jack cheese
Fresh cilantro, optional

INSTRUCTIONS
1. For the slow cooker: in a 4- or 5-quart slow cooker, add the beef roast. Whisk together the broth, vinegar, salsa, cumin, chili powder, onion powder, garlic powder, salt and pepper. Pour over the roast, cover the slow cooker, and cook on low for 8-10 hours until the beef is tender and shreds easily.
For the Instant Pot/Electric Pressure Cooker: in a 6-quart electric pressure cooker, add the beef roast. Whisk together the broth, vinegar, salsa, cumin, chili powder, onion powder, garlic powder, salt and pepper. Pour over the roast, secure the lid on the pressure cooker and close the valve. Cook on high pressure for 60 minutes. Let the pressure naturally release for 15 minutes (or all the way). Release the remaining pressure.

2. Remove the roast and place in a large bowl or shallow pan (like a 9X13-inch pan). Shred into bite-size pieces with two forks.

3. Turn the Instant Pot to sauté and bring the liquid to a simmer (for a slow cooker, pour the liquid into a saucepan and bring to a simmer).
In a small bowl, whisk together the cornstarch (or flour) with about 2-3 tablespoons water (use a bit more water if using flour). Add the slurry to the simmering liquid, whisking constantly, and cook, stirring constantly, until the mixture is thickened slightly, 4-5 minutes. Add additional salt and pepper to taste, if needed.

4. Pour about 1/2 cup sauce in with the beef and stir. Use as desired (instructions for enchiladas below).

5. To make enchiladas: Spread about 1/2 cup sauce on the bottom of a 9X13-inch pan.
Toss the cheddar and Monterey Jack cheeses together.
Spread shredded beef in the center of each tortilla. Sprinkle with cheese. Roll up and place in the pan, seam-side down.

6. Spread 1-2 cups of sauce over the top of the enchiladas. Sprinkle with cheese.
Bake at 350 degrees for 20-30 minutes until bubbly and hot. Let the enchiladas rest for 5-10 minutes before serving.
Sprinkle with fresh cilantro, if desired, and serve.

March 13, 2024

Blueberry Sour Cream Cookies


2 cups flour

1/2 tsp baking powder

1/4 tsp salt

1/2 cup butter, softened

1 cup sugar

1 large egg

1 tsp vanilla

1/4 cup sour cream

1.  Preheat oven to 375℉. In a bowl whisk together the flour, baking powder, and salt.

2.  In another bowl, cream together the butter and sugar until light and fluffy.  Beat in egg and vanilla.

3.  Gradually mix in dry ingredients, alternating with sour cream.

4.  Gently fold in blueberries

5.  Drop spoonfuls of dough onto a baking sheet lined with parchment or Silpat.  

6.  Bake for 12-15 minutes or until edges are lightly golden.

7.  Let cool on baking sheet for 5 minutes before transferring to a wire rack to cool completely

Makes 24 cookies

March 8, 2024

Abi's Chocolate Chip Cookies


1 cup butter, room temperature
1 cup sugar
1 cup brown sugar
2 tsp vanilla
2 eggs
3 cups all-purpose flour
1 tsp baking soda
1 tsp baking powder
1/2 tsp salt
12 oz milk chocolate chips

1.  Preheat oven to 400℉.

2.  Cream the butter and sugars together.  Add vanilla and eggs.  Mix until combined thoroughly.

3.  In a separate bowl mix flour, baking soda, baking powder and salt together. Add to butter mixture.  Once combined add chocolate chips until just combined.

4.  Scoop 2 TBS of dough into balls and place on a greased or lined baking sheet.  Bake for 7-9 minutes.  Take cookies out of oven before they look completely ready.  

Makes about 3-1/2 dozen cookies.

*If desired add 1 cup white chocolate chips, 3/4 cup chopped nuts and 1 cup coconut or any variation of chocolate chips you desire.

*If the cookies are too late add a tiny bit of flour.  If they are too dry add a little bit of water.

These cookies freeze well

Variation: Chocolate Chip Bars with salted Caramel center

1. Melt 1 bag of Kraft Wrapped Caramels and 1 can sweetened condensed milk over low heat.

2.  Make 1-1/2 time the chocolate chip cookie recipe.  Place 1/2 the cookie dough on bottom of a 9x13 inch pan.  Pour melted caramel mixture on top and sprinkle with flaked sea salt.  Drop the remaining dough over caramel in small clumps.

3.  Bake 20-25 minutes at 375℉.

from Abi Ayres

March 1, 2024

White Chocolate Truffle Cupcakes


White Chocolate Cupcakes

Servings: 18 cupcakes

Ingredients

For the cupcakes:

1-1/2 cups flour

1 tsp baking powder

1/2 tsp salt

1/3 cup butter (5 and 1/3 tablespoon), softened

3/4 cup sugar

2 large eggs

4 oz good-quality white chocolate, chopped and melted

1 tsp vanilla

1 cup plus 1 tablespoon milk 

For the frosting:

8 oz cream cheese, at room temperature

1/2 cup (1 stick) unsalted butter, at room temperature

2 oz white chocolate, melted

2 tsp vanilla

6 tsp milk

4-6 cups powdered confectioners’ sugar

18 white chocolate truffles (I used Lindt)


Instructions

1. For the cupcakes: Preheat the oven to 325 degrees F.

2. Line a cupcake pan (or two) with the cupcake liners of your choice.

3. In a large bowl, whisk together the flour, baking powder, and salt; set aside.

4. In the bowl of your standing mixer fitted with the paddle attachment, cream the butter and sugar together on medium-high speed until light and fluffy, about 2-3 minutes.

5. Add the eggs, one at a time, mixing well after each addition.

6. Add the melted white chocolate and vanilla, mixing well.

7. Alternately add the dry ingredients with the milk in 2-3 portions, mixing well after each addition.

8. Divide the batter evenly into the prepared cupcake pan.

9. Bake the cupcakes until a tester inserted into the center comes out clean, about 20-22 minutes or so.  Cut a small hole in the top of the cupcake or an x and insert truffle while still warm.  Then let cool completely before frosting. 

10. For the frosting: In the bowl of your standing mixer fitted with the paddle attachment, cream the cream cheese and butter on medium speed until smooth, about 1 minute.

11. Add the melted white chocolate, vanilla, and milk.

12. Reduce the mixer speed to low and add the confectioners’ sugar, until you reach your desired consistency. *I added the full 6 cups of sugar for proper piping consistency.

13. Pipe as desired onto completely cooled cupcakes.


February 26, 2024

Biscoff Sandwich Cookies


Ingredients

For the cookies:
16 Biscoff cookies, pulverized to a crumb
2-1/2 cups all-purpose flour
1 tsp baking soda
1/2 tsp baking powder
1/2 tsp salt
3/4 cup unsalted butter, slightly cold
1/2 cup smooth Biscoff cookie butter
1 cup brown sugar, packed
3/4 cup granulated sugar
2 eggs, cold
1 tsp vanilla extract

For the Filling:
3/4 cup unsalted butter, slightly cold
3/4 cup smooth Biscoff cookie butter
2 cups powdered sugar, measured then sifted

Instructions

For the Cookies
1. Preheat your oven to 350 degrees F. Line a cookie sheet with parchment paper. Set aside.

2. In a medium size mixing bowl, whisk together the Biscoff cookie crumbs, flour, baking soda, baking powder, and salt. Set aside.

3. In the bowl of a stand mixer fitted with the paddle attachment, beat the butter and cookie butter until smooth.

4. Add the brown sugar and granulated sugar and mix until, fluffy and smooth, about 2 minutes.
Stir in the eggs and vanilla until well blended.

5. With the mixer on low speed, add the dry ingredients and mix until just combined.

6. Using a spoon or cookie scoop, form tablespoon size balls of cookie dough. This recipe will make 70 individual cookies, 35 full cookie sandwiches.

7. Place the cookie dough about 1 to 2 inches apart on the cookie sheet. (I fit 20 on each of my pans).

8. Bake the cookies for 8 to 10 minutes. Remove from oven and allow the cookies to cool completely before adding the filling.

For the Filling
9. In the bowl of a stand mixer, beat the butter and cookie butter on medium-high speed until smooth.
Stir in the powdered sugar and beat for an additional two minutes.

10. Using a piping bag, pipe buttercream onto one of the cookies and sandwich it with a second cookie.

February 16, 2024

Crockpot Juicy Steak


Ingredients:

Stew Meat (about 3 lbs) or steak cut into 1 inch pieces

1 packet Au Jus

1 packet onion soup mix

1 (14.5 oz) can beef broth

Instructions:

1.  Dump all ingredients into the crockpot, cook on high 3- 4 hours or low 6-8 hours.

Serve with mashed potatoes or with rice and vegetables.


February 13, 2024

Red Velvet Cake/Cupcakes


Ingredients

1/2 cup unsalted butter at room temperature
3/4 cup light brown sugar, packed
1 cup granulated sugar
2 TBS red velvet emulsion (I used LorAnn Oils Emulsions)
3 large eggs, at room temperature
2-1/4 cups all-purpose flour
2 TBS cocoa powder
1 tsp salt
1- 1/2 cups buttermilk, at room temperature
1/4 cup sour cream, at room temperature
1 TBS vinegar
1-1/4 tsp  baking soda


Instructions

1. Preheat the oven to 325 degrees F. Spray the bottom and sides of three 8-inch or four 6-inch round cake pans with nonstick spray, line the bottom with parchment paper, and spray again with the nonstick spray. Set aside. (I got 30 cupcakes)

2. In a stand mixer fitted with the paddle attachment, combine the butter, granulated sugar, brown sugar, and red velvet flavor. Beat the ingredients on medium-high speed for about 5 minutes, until the mixture is light in color and slightly increased in volume.

3. Lower the speed and add the eggs, one at a time, mixing until each egg is incorporated before adding the next. Continue to beat on medium-high until smooth and nearly double in volume.
In a separate bowl, whisk together the flour and cocoa powder. Sprinkle the salt on top of the dry ingredients and whisk until combined.

4. With the stand mixer on low speed, alternately add the dry ingredients and the buttermilk into the butter mixture, beginning and ending with dry ingredients. Mix until just incorporated. Fold in the sour cream.
In a small bowl, combine the vinegar and baking soda until it fizzes and then add to the batter. Stir until blended.

5. Divide the batter evenly between the prepared pans (about 16 oz. of batter in each 8-inch or 12oz in each 6-inch).

6. Bake for 25 to 30 minutes, or until a toothpick inserted in the center of the cake comes out with a few moist crumbs on it. (my cupcakes took 20 minutes).

7. Let pans cool on wire rack for about 10-15 minutes before inverting the cakes onto racks. Let cool completely.

8. Level cakes if needed. Chill the cakes for at least an hour before using. Can be stored the freezer for up to one month wrapped well in plastic wrap and foil.

Frost with Cream cheese or buttercream frosting  

February 12, 2024

Chicken Pot Pie


2 cups peeled potatoes, cut into bite-size chunks
1- 1/2 cups carrots, peeled and sliced
1 cup butter (2 sticks)
2/3 cup chopped onion
1 cup all-purpose flour
1 3/4 tsp salt
1 tsp dried thyme
3/4 tsp pepper
3 cups chicken broth
1- 1/2 cups milk
4 cups cubed cooked chicken
1-1/2 cups frozen peas
1/2 cup frozen corn
2 packages refrigerated double pie crust (or your favorie homemade recipe)


1. Put the potatoes and carrots in a large pot, and cover it with water.
Cook over high heat until it boils for several minutes and potatoes and carrots are tender when poked with a fork, but don’t overcook.

2. Drain water and set potatoes and carrots aside. In the large pot, combine the butter and onion over medium heat, while the butter melts, stir often, cooking the onions.

3. When onions are soft, add the flour and seasonings and mix well.

4. Add the broth and milk. Stir until thickened.

5. Add the chicken, peas corn, potatoes, and carrots and mix to combine.

6. Prepare two pie dishes by lining them with an uncooked pastry crust. Pour half of the chicken and vegetable mixture into each pie shell.

7. Cover with the top pie crusts, and let the top layer overlap the bottom crust, pinching seams to seal, then fluting the edge of the seam.

8. Crack an egg into a bowl and beat it. Brush the beaten egg over the top, then with a sharp knife, cut some slits in the top of the pie so it can vent steam.

9. Bake at 425° F for 35-40 minutes. Let cool for about 10 minutes before digging in.

*You can freeze the filling for later.  Thaw and fill pie crust when you want to bake.


from Ambers Kitchen Cooks


February 11, 2024

Easy Sourdough Biscuits


yield: 14 BISCUITS
prep time: 25MINUTES MINS
cook time: 20MINUTES MINS
total time: 45MINUTES MINS

INGREDIENTS
3 cups (426 g) all-purpose flour
1- ½ TBS baking powder
1 TBS granulated sugar
¾ tsp table salt
½ tsp baking soda
¾ cup (12 tablespoons) very cold or frozen salted butter
1- ½ cups (sourdough starter, fed or discard
¾ cup  buttermilk
Melted butter, for brushing

INSTRUCTIONS

1. Preheat oven to 425 degrees F. Line a half sheet pan with parchment paper. Set aside.

2. In a large bowl, whisk together the flour, baking powder, sugar, salt, and baking soda.

3. Using the large holes of a box grater, grate in the cold butter. (Alternatively, you can cut the butter into the dry ingredients using a pastry blender or use a food processor for this step.)

4. Toss the butter with the dry ingredients until evenly mixed.

5. Add the sourdough starter and buttermilk. Fold/gently mix the biscuit dough until it starts to come together in a rough mass and only a few dry streaks remain.

6. Turn the biscuit dough out onto a lightly floured counter. Gently pat the dough into a rectangle about 1-inch thick. Gently fold the dough in thirds and then lightly press into a thick rectangle. Repeat the folding process one more time and then press or roll the dough into a rectangle about 1-inch thick.

7. Cut the dough into 12 to 14 squares (or you can use a round biscuit cutter - re-rolled scraps may not be as flaky as the first biscuits cut).

8. Place the biscuits 1/2-inch apart on the prepared baking sheet. Bake for 20-22 minutes until golden and baked through.

9. Immediately out of the oven, brush with melted butter. Serve warm.

NOTES
Sourdough Starter: my sourdough starter is fed at a 1:1:1 ratio and is thick but pourable. If your sourdough starter has a different consistency, it's possible you may need to add more flour (or more buttermilk) to help the dough come together. The most important factor in making these biscuits is to work quickly so the butter doesn't melt and to not overwork the dough.
Butter: if using unsalted butter, increase the salt in the recipe by 1/4 teaspoon or so.

 from Mel's Kitchen Cafe

February 8, 2024

Mississippi Pot Roast (no packets)


INGREDIENTS
3 to 4 pound boneless beef chuck roast (see note for other options)
1 TBS garlic powder or granulated garlic
2 tsp dried parsley
2 tsp onion powder or granulated onion
1 tsp dried dill weed
1 tsp coarse salt
¼ cup beef broth
¼ cup liquid from jar of pepperoncini
2 TBS cornstarch
1 TBS soy sauce
1 TBSWorcestershire sauce
1 TBS beef bouillon paste (optional - see note)
4 TBS butter, cut into pieces
4 to 6 pepperoncini, optional

INSTRUCTIONS
1. Place the roast in the insert of a 6- or 8-quart slow cooker.

2. In a small bowl, combine the garlic powder, parsley, onion powder, dill and salt. Sprinkle evenly over the beef.

3. In a small bowl, whisk together the beef broth, pepperoncini liquid, cornstarch, soy sauce, Worcestershire sauce and bouillon paste (if using). Pour over the beef. Turn the beef once or twice to coat in seasonings and liquid.

4. Place the butter pieces and pepperoncini on top of beef.

5. Cover the slow cooker on cook on low for 8 to 10 hours or high for 4 to 6 hours until the beef is fall-apart tender. Remove the pepperoncini and shred the beef with two forks right in the slow cooker, tossing the beef with the cooking liquid/gravy. Add additional salt, to taste, and toss with the beef and sauce, if needed. Return the pepperoncini to the slow cooker, if desired.

6. Keep warm until ready to serve. Serve warm over mashed potatoes or rice or on buns.

NOTES
Beef Roast: Mississippi pot roast is classically made with boneless chuck roast. This marbled cut of beef does very well cooked low and slow. Boneless chuck roast can render quite a bit of fat after cooking. If you want to minimize the fat, after the cooking time is done, use a fat separator to strain the cooking liquid. You can also experiment using a different cut of beef, like sirloin tip roast, arm roast, or bottom round roast. I've had good luck slow cooking all of these types of beef roasts. Because they have less fat, these cuts of beef may put off less liquid while cooking, so keep an eye on the meat so it doesn't dry out and add extra broth, if needed (or mix up additional sauce from the recipe and add it).

Extra Gravy: as written, the meat is saucy but there isn't cups and cups of extra gravy. The "sauce" ingredients can be doubled if you want extra gravy. 

February 5, 2024

Key Lime Poke Cake


For the cake

1 package vanilla cake mix (15.25 ounces)
1 package instant vanilla pudding mix (3.4 ounces)
¾ cup sour cream
¾ cup vegetable oil
3 large eggs lightly beaten
2 tsp pure vanilla extract
½ cup warm water
zest of 2 limes

For the filling
1 can sweetened condensed milk (14 ounces)
⅔ cup key lime juice, I used Nellie & Joe’s bottled key lime juice
⅔ cup heavy whipping cream

For the topping
1- 1/2 cups heavy whipping cream
1 tsp vanilla extract
1/2 cup powdered sugar

Instructions

1. Preheat oven to 350°F and line a 9×13-inch pan with parchment paper or spray with non-stick cooking spray.

2. In the bowl of a stand mixer, fitted with the paddle attachment, or with a hand mixer in a large bowl, beat together the cake mix, pudding mix, sour cream, oil, eggs, vanilla, water and lime zest on medium speed until well combined, about 2 minutes. Be sure to scrape the bottom of your bowl as needed.
Spoon batter into the prepared pan and use an offset spatula or spoon to spread the batter into an even layer.

3. Bake in preheated oven for 35-40 minutes, or until golden brown and the top of the cake springs back when lightly touched.

4. Allow cake to cool for 10 minutes. Using a smoothie straw or the handle of a wooden spoon, poke holes across the cake, spaced every inch or so, halfway into the cake.

5. In a medium bowl, whisk together the sweetened condensed milk, lime juice and heavy cream. Immediately pour the mixture evenly over the cake, making sure it gets into the holes. Allow cake to cool completely. Then chill for at least 1 hour

6. While cake chills, make the topping. To a medium bowl, add whipping cream and vanilla extract. Beat with an electric mixer until starting to thicken, then gradually add powdered sugar and continue beating until stiff peaks form.

7. Spread over cake and garnish with graham cracker crumbs, sliced limes and lime zest, if desired. refrigerate for at least 4 hours before serving.


February 4, 2024

Twix Thumbprint Cookies


Ingredients
1 cup salted butter, softened
1- 1/4 cup powdered sugar
1 egg
3 tsp vanilla extract
2-1/2 cups cake flour
1 tsp baking powder
1/2 tsp salt
30 soft caramels  (I used about half of this 6 minute caramel recipe)
1 TBS milk
1/2 cup milk chocolate melting wafers  *can also use melted chocolate chips

Instructions
1. Preheat the oven to 350° F. Line a cookie sheet with parchment paper or a silicone baking mat. Set aside.

2. In the bowl of a stand mixer, combine the butter, powdered sugar and egg until well combined.
Add the vanilla extract and mix well.

3. Lastly, add the cake flour, baking powder and salt. Mix until a very soft dough forms.
Allow the dough to sit for 5 or so minutes to make it easier to handle.

4. Portion the dough out into 1 TBS portions. Roll into a ball and arrange on the cookie sheet.
Using a 1/2 tsp measuring spoon, press down in the center of the ball of dough to make a crater. I find that this is easier if I dip the measuring spoon into flour in between pressing on each ball of dough.
Once all of the cookies have been pressed, bake at 350° F for 8-10 min. The cookies will spread but should have a faint crater in the middle still.

5. Immediately after pulling the cookies out of the oven, take a 1 tbsp measuring spoon and press down in the center of the cookie, deepening the ‘thumbprint’.

Note: I have tried leaving the cookies as a ball, baking and then making the thumbprint after they come out of the oven and it does not work. the cookies fall apart.

6. Allow the cookies to cool completely.

7. Once the cookies are completely cool, melt together the caramels and milk in the microwave. Microwave for 30 seconds and then stir until melted and smooth.

8. Carefully spoon caramel into the center of each cookie. Allow the caramel to set up- the cookies can be placed in the fridge to help speed up this process.
Once the caramel has set up, drizzle melted milk chocolate onto the tops of the cookies.

Can store at room temperature or in the fridge for up to 4 days.

February 3, 2024

Caramels with Chocolate and Pecans


1 cup pecans, chopped
2 cups milk chocolate chips
1 cup butter (I use salted)
2 cups brown sugar
1 cup corn syrup
1 (14 oz) can sweetened condensed milk
1 tsp vanilla


1. Line a 9×13 pan with tin foil. Spray it generously with cooking spray. (you don't want Carmel to stick)

2. Chop 1 cup of pecans. Heat a medium-sized skillet over medium high heat. Add the nuts and toast them for about 3-4 minutes or until they change slightly in color and start to smell fragrant and wonderful.

3. Sprinkle half of the pecans over the tin foil. Sprinkle 1 C milk chocolate chips over the nuts and set the pan aside.

4. Grab a heavy sauce pan and place a candy thermometer in it.

5. Turn the heat to medium high. (I like to keep mine closer to high than to medium). Place 1 C butter in the pan and allow it to melt. Add brown sugar, sweetened condensed milk, and corn syrup. Stir it all together with a wooden spoon.

6. Now, bring the mixture to a boil and keep stirring constantly. You want to cook the caramel to 235-240 degrees. Depending on how high you keep the temperature, this can take from 10-20 minutes.

7. I like to keep a small bowl of ice water and a spoon next to the stove top while I am stirring. When the caramel hits 230 degrees, dip the spoon in the caramel and then in the ice water for 10 seconds or so. Press your finger into the caramel. If your finger indentation stays put, the caramel is done.

8. Remove the pan from the heat and add 1 tsp vanilla. Stir to combine.

9. Pour the caramel into the pan, making sure to cover all of the chocolate and pecans.

10. Sprinkle the remaining pecans and 1 C milk chocolate chips over the caramel.

11. Allow the candy to set up for at least 4 hours.

12. Using the edges of the tin foil, lift the caramel from the pan and slice it into small squares with a sharp knife. I sprayed my knife with a bit of cooking spray and that made the cutting much easier. They keep for 1-2 weeks in a sealed container.

from Jamie Cooks it Up

February 1, 2024

Peanut Butter Lunch Lady Cookie Bars


  • 2 cups flour
    2 cups sugar
  • 2 large eggs beaten
    1- ½ cup peanut butter divided
    1- ½ cups, (3 sticks unsalted butter), softened
    ½ cup milk + 2 TBS divided
    1 tsp baking soda
    1 tsp vanilla extract
    1 tsp salt
    4 cups powdered sugar

    Instructions

    1. Preheat oven to 400°F. Grease a large cookie sheet or line with parchment paper.

  • 2. Mix together dry ingredients: flour, sugar, baking soda, and salt. Set aside.

  • 3. Whisk together ½ cup milk, vanilla extract, eggs. Set aside.

  • 4. In a saucepan, melt 1 cup (2 sticks) of butter and 1 cup peanut butter, bring to a boil. Remove from heat and slowly add flour mixture, followed by milk and egg mixture. Mix until well combined.
    Pour batter onto cookie sheet, spreading batter evenly to edges. 

  • 5. Bake for 15-20 minutes or until toothpick inserted in center comes out clean. Cool completely before frosting.

    6. For frosting: In a saucepan, bring 1 stick butter and ½ cup peanut butter to a boil. Add 2 tablespoons milk and slowly mix in powdered sugar until well combined. Pour frosting over cake, spreading evenly to edges. Allow frosting to cool and set before serving.

January 31, 2024

Lasagna Soup


1/2 pound lean ground beef
1/2 pound ground Italian sausage
salt and freshly ground pepper, to taste
1 yellow onion, chopped
1 TBS olive oil
3 cloves garlic , minced
2 TBS tomato paste
24 oz marinara sauce
1/4 tsp red pepper flakes
2 TBS fresh parsley, chopped (or 2 tsp dried)
1/2 tsp dried oregano leaves
1 tsp dried basil
7 cups low sodium chicken broth  (or vegetable broth)
9 lasagna noodles, broken into pieces (I used bowtie because that's what I had)
2 cups fresh spinach leaves (optional),
10 oz ricotta cheese (or cottage cheese)
1 cup shredded mozzarella cheese
1/2 cup freshly grated parmesan
fresh basil, for serving

Instructions

1. In a large pot over medium-high heat, cook ground beef and sausage until browned. Season with salt and pepper as you cook. Drain grease and remove meat from the pot.

2. In a large pot heat olive oil over medium heat. Toss in diced onion and sauté for about 5 minutes, stirring occasionally. Add in minced garlic and cook for another minute or two.

3. Stir in tomato paste, marinara sauce, spices, and broth. Return meat to pot.
Bring to boil then add lasagna noodles (broken into 4ths) to pot
and reduce heat to medium-low and cook, stirring occasionally, until noodles
are tender. Add spinach, if using.

4. In a small bowl, stir together mozzarella, Parmesan and ricotta cheeses
Ladle the hot soup into bowls, and dollop a scoop of the cheese mixture on top (I usually just add it all to the soup and let it melt in before serving). Garnish with fresh basil

Notes:

Store lasagna soup covered, in the refrigerator for 3-4 days.

Make Ahead Instructions: Make the recipe up to step 4. Do not add the noodles to the pot. Store the soup in the refrigerator. When ready to serve, start at step 5, bringing the soup to a boil and cooking the noodles at that point. Serve with a dollop of cheese.

Freezing Instructions: Freeze lasagna soup without the cheese. Place soup in a freezer safe container and freeze for 2-3 months. Thaw in the refrigerator overnight and reheat slowly on the stovetop. If you are making this recipe specifically for freezing, you may choose to make the noodles fresh once ready to serve (see make ahead instructions).

January 30, 2024

Creamy Taco Soup


Ingredients
1 pound lean ground beef
4 cups chicken broth
2 (10 oz) cans Ro-tel diced tomatoes & green chilies with juices
1 (14 oz) can black beans drained & rinsed
1 (12 oz) can corn drained
1/2 red bell pepper chopped
1/2 TBS chili powder
1 tsp garlic powder
1 tsp onion powder
1 tsp ground cumin
1 tsp smoked paprika
8 oz cream cheese softened
Salt & pepper to taste
Toppings (optional): grated cheddar, avocado, cilantro, tortilla strips, etc.

Instructions

1. Add the ground beef to a large soup pot over medium-high heat. Brown it, breaking it up with your spoon as you go along, for about 10 minutes. If there's excess fat, spoon most of it out.

2. Add the remaining ingredients to the pot except for the cream cheese and salt & pepper.
Increase the heat to high and bring the soup to a boil. Then turn down the heat so it's simmering gently, uncovered, for 8 minutes. While the soup cooks, prep your toppings.

3. Cut the cream cheese into smaller pieces and add it to the soup. Let it melt in (you may have to stir it a fair bit until it's fully dissolved). Season the soup with salt & pepper and serve with toppings as desired.

Notes

The cream cheese for this recipe should be super soft so it melts into the soup easily. I recommend taking it out of the fridge prior to starting the recipe and then microwaving it in 20-30 second intervals until it's very soft.

You can use beef broth instead of chicken broth if you don't mind the soup being a darker color. If you have any concerns with salt, use low-salt broth.

If you want to make this soup spicy, add 1/2 teaspoon of cayenne pepper.

If you're not using Rotel diced tomatoes, you can use regular ones, but I suggest adding a can or two of diced green chilies as well (the 4 oz. size ones) since it really makes a difference in the way the soup tastes.