Pages

December 3, 2021

Salted Caramel Skillet Cookie


Ingredients:

1 cup salted butter, room temperature
1 cup light brown sugar
1/2 cup granulated sugar
2 eggs
1 tsp vanilla extract
1 tsp salt
1 tsp baking soda
2- 1/4 cups all purpose flour
1- 1/2 cups semi-sweet chocolate chips
1/2 cups coarsely crushed pretzels
1 (11- ounce) bag soft caramels, unwrapped
1/3 cup milk
optional – 2 tsp flaked sea salt

Instructions

1. Preheat oven to 350°F. Grease a 10- inch skillet with butter, or nonstick spray. Set aside.

2. In the bowl of your stand mixer fitted with the paddle attachment mix the butter, brown sugar, and granulated sugar on medium speed for 2 minutes.

3. Add in the eggs, vanilla, salt, and baking soda and mix for 1 minute until smooth, scraping the sides of the bowl as necessary.

4. Turn the mixer to low and add flour, mixing for 30 seconds, or until just combined.

5. Stir in the chocolate chips and crushed pretzels. Set the dough aside.

6. Place the caramels and milk in a large, microwave-safe bowl. Microwave in 30- second increments, stirring after each until the caramels are melted and smooth.

7. Press 2/3 of the cookie dough into the bottom of the prepared skillet. Pour the caramel evenly on top, doing your best to keep it away from the edge.

8. Scoop out the remaining dough by the tablespoon and flatten each portion, placing it evenly on top of the caramel. Some of the caramel will peek through, this is ok.

9. Bake for 25- minutes, or until the edges are golden. The top will be just set, but slightly wobbly.
Sprinkle with sea salt, if desired.

10. Allow the skillet cookie to cool for 20 minutes in the pan before serving. Eat right out of the skillet, or scoop into bowls and top with ice cream!

Store airtight at room temperature for up to 3 days.

from Cookies and Cups

December 1, 2021

Brownie Gooey Bars


1 (approximately 18 ounces) brownie mix
1 egg
1/2 cup (1 stick) butter
1/2 cup sweetened condensed milkregular or fat-free
1 cup semi-sweet chocolate chips

INSTRUCTIONS

1.  Preheat oven to 350°F.  Line a 9x9” pan with foil and spray with cooking spray for easy removal, if desired or just spray the pan.

2. Add brownie mix, egg, and butter to the bowl of a stand mixer fitted with the paddle attachment. Beat until at thick mixture forms (thicker than cookie dough). You can do this with a hand mixer but it will take a really long time!

3. Press half the mixture into the bottom of the prepared pan. Top with the chocolate chips and pour the sweetened condensed milk over the top, but try to not let the milk touch the edges of the pan. (That will cause it to bubble and brown.) Break pieces of the remaining dough and drop them evenly over the top of the bars, then press gently to compact.

4. Bake for 27-32 minutes, until the top starts to loose the glossy look. Cool to room temperature before cutting.

5. Store at room temperature for maximum gooeyness.


from Crazy for Crust

November 26, 2021

Buttermilk Pumpkin Waffles


INGREDIENTS

3 large eggs
1- 1/4 cups buttermilk
6 TBS (3/4 stick) unsalted butter
2 cups all-purpose flour
2 TBS granulated sugar
1 TBS pumpkin pie spice
1 tsp baking powder
1/2 tsp salt
1/2 tsp baking soda
3/4 cup pumpkin purée
optional add in chocolate chips
Cooking spray

INSTRUCTIONS

1. Place 3 large eggs and 1- 1/4 cups buttermilk in a medium bowl and let sit at room temperature for 30 minutes. Meanwhile, prepare the remaining ingredients.

2. Cut 6 tablespoons unsalted butter into 4 pieces and place in a small microwave-safe bowl. Microwave on high until just melted, about 30 seconds. (Alternatively, melt in a small saucepan on the stovetop over low heat.) Let cool slightly.

3. Heat a waffle iron according to the manufacturer's instructions.

4. Place 2 cups all-purpose flour, 2 tablespoons granulated sugar, 1 tablespoon pumpkin pie spice, 1 teaspoon baking powder, 1/2 teaspoon kosher salt, and 1/2 teaspoon baking soda in a medium bowl and whisk to combine.

5. Add the melted butter and 3/4 cup pumpkin purée to the bowl of eggs and buttermilk. Whisk to combine. Pour into the flour mixture and stir until mostly incorporated and no streaks of dry flour remain. (A few lumps are okay.)  Fold in chocolate chips if desired.

6. Grease the waffle iron with cooking spray. Spoon or pour the batter into the waffle iron and cook according to the manufacturer's instructions, usually for 3 to 5 minutes. (You will need 1/2 to 2/3 cup of batter per waffle for a Belgian or big waffle maker, but the size can vary quite a bit. Consult the manufacturer's instructions for each model for specific guidelines.)

7. Transfer cooked waffles to a baking sheet and keep warm in the oven if desired.

November 24, 2021

Easy Freezer Breakfast Burritos


16-24 ounces breakfast sausage (see note)
1 cup small diced bell peppers (any color)
1/2 cup small diced onion
10 large eggs
1-1/2 cups milk
3/4 cup sour cream
1 tsp salt
1/4 tsp black pepper
30 ounces (about 7-8 cups) frozen tater tots (thawed cooks faster)
10-inch (burrito size) flour tortillas
3-4 cups shredded cheese (cheddar, Monterey Jack, etc)

1.  In a large skillet over medium heat, cook the sausage, peppers and onions, crumbling the sausage into small pieces as it cooks, until it is no longer pink and cooked through and the veggies are tender. Drain the grease (you can let the sausage/veggies hang out in the skillet for a minute or remove them to a plate).

2.  In a medium bowl, whisk together the eggs, milk, sour cream, salt and pepper until smooth.

3.  Lightly grease a 9x13-inch baking pan. Place the tater tots in the bottom of the pan (it's ok if they are overlapping a bit).

4.  Sprinkle the sausage and veggie mixture over the tater tots. Pour the egg mixture evenly over and across the top. Bake right away OR cover the dish and refrigerate (up to 18 hours).

5.  Preheat the oven to 350℉. Bake covered for 30 minutes. Uncover and bake 25-45 minutes longer until golden, bubbly, and set (don't panic if you have to add more time - continue to bake until the casserole is no longer liquidy). (if the tater tots are thawed it bakes quicker)

6.  If freezing the burritos, let the casserole cool until just warm or room temperature. If serving right away, go right on ahead with step #7.

7.  Scoop about 1/2 cup of the casserole onto each tortilla (if using smaller tortillas, adapt the amount as needed). Sprinkle with shredded cheese. Fold the sides in and roll up into a burrito. Serve warm with avocados, sour cream, and/or salsa, if desired (or plain).


Sausage/Meat: this recipe is super adaptable to changing what kind of meat you use OR it can easily be left meatless. Chopped ham or cooked bacon would work great, too, in place of the sausage or in addition to.

Freezing: to freeze, put the cooled, rolled burritos in a freezer ziploc bag (you can individually wrap each burrito in plastic wrap or foil before pacing in the bag, if desired). 

The burritos can be reheated in the microwave or in the oven (unwrap, place in baking dish, cover with foil and bake at 350 degrees for 45 minutes, uncover and continue to bake until heated through, another 20-30 minutes).

*If using microwave to reheat uncover; wrap in a paper towel and microwave for 1 minute.  Poke a few holes in tortilla and then microwave for another minute.  

from Mel's Kitchen Cafe


November 23, 2021

Kalua Pork and Teriyaki Sauce


Ingredients

4 pounds pork shoulder roast (fat trimmed)
1 TBS sea salt
1 TBS liquid smoke flavoring
4 cups cooked brown rice(or white rice)
1 green pepper, diced (optional)
2 tomatoes, diced (optional)
½ onion, chopped (optional)
½ cup banana peppers sliced (optional)
1 cucumber diced (optional)
2.5 ounces sliced olives 1 can (optional)
⅓ cup teriyaki sauce (optional)

Instructions

1. Pierce pork all over with a carving fork. Rub salt and liquid smoke over meat.

2. Place roast in a slow cooker, cover and cook on low 10-12 hours. Turn once about halfway through cooking time.

3. Remove meat from slow cooker and shred with 2 forks, adding drippings as needed to moisten. Serve over rice, topped with your favorite optional toppings and teriyaki sauce.

Notes
This pork also makes a great salad topping, or meat for tacos, burritos, or quesadillas.

from Six Sisters Stuff


Teriyaki Sauce:

Ingredients:

1⁄4 cup soy sauce
1 cup water
1⁄2 tsp ground ginger
1⁄4 tsp garlic powder
5 TBS brown sugar, packed
1-2 TBS honey
2 TBS cornstarch
1⁄4 cup cold water

Directions:

1. Mix all but cornstarch and 1/4 cup cold water in a sauce pan and begin heating.

2. Mix cornstarch and cold water together in a cup and dissolve.

3. After sauce is simmering, add cornstarch and water mixture, whisking well until sauce thickens.

4. Heat until sauce thickens to desired thickness. Add water to thin if you over-thicken it.

From Food.com

November 22, 2021

Raspberry Cream Pie


Ingredients


1 (6 oz) ready-to-use Graham Cracker or Shortbread Crust or make your own

Cheesecake Layer:
4 oz cream cheese, softened
1/3 cup powdered sugar
1/2 tsp vanilla extract
1/2 cup heavy whipping cream

Raspberry Layer:
3 TBS water
3 TBS cornstarch
1 cup granulated sugar
1 bag (12 oz) frozen raspberries
additional whipped cream & fresh raspberries for garnish

Instructions

1. In a bowl, combine the softened cream cheese, powdered sugar, and vanilla extract. Beat together with a hand mixer until combined and creamy.

2. In a separate smaller bowl, beat the heavy whipping cream for several minutes until stiff peaks form. Add the whipped cream to the cream cheese mixture and beat together until well combined.

3. Evenly spread the whipped cream cheese mixture into the bottom of the prepared cracker crust. Cover with the lid and refrigerate for 6-8 hours.

4. Start preparing the raspberry layer.
Stir the water and cornstarch together with a fork in a small bowl.
In a saucepan over medium-high heat, combine the sugar and frozen raspberries. Stir together and cook for several minutes until it's boiling. Once boiling, add the water/cornstarch mixture and stir. Let this mixture boil for 2 minutes.

5. Turn off the heat and let the raspberry mixture cool for about 30 minutes in the pan. Transfer it to a Tupperware dish and let refrigerate alongside the cream cheese pie.

6. After the 6-8 hour fridge time, evenly spread the cooled raspberry mixture (that was in the fridge too) over the cream cheese layer. Cover with lid and refrigerate overnight.

7. If wanted, serve with additional whipped cream and fresh raspberries.

November 21, 2021

Classic Carrot Cake


FOR THE CAKE 
1 cup vegetable or canola oil
1/2 cup applesauce can substitute with crushed pineapple
1 cup packed brown sugar
1 cup granulated sugar
6 eggs at room temperature
2 tsp. vanilla extract
3 cups all -purpose flour
2 tsp. ground cinnamon
1/2 tsp. ground nutmeg
1/4 tsp. ground ginger
1/4 tsp. ground cloves
1 TBS baking powder
1 tsp. baking soda
1 tsp. salt
4 cups freshly grated carrots

FOR THE BUTTERCREAM
1- 1/2 cups unsalted butter, slightly cold
6 oz. cream cheese slightly cold
6 cups powdered sugar, measured and then sifted
3 TBS heavy whipping cream
1 tsp vanilla extract
pinch of salt

FOR THE CAKE

1. Preheat your oven to 350℉. Spray three 8-inch round cake pans with nonstick spray, line the bottoms with parchment paper and spray again. Set aside.

2. In a medium size mixing bowl, combine the flour, spices, baking powder, baking soda and salt. Whisk to combine. Set aside.

3.  In the bowl of an electric mixer fitted with the paddle attachment, combine the oil and sugars. Beat on medium speed for about two minutes.

4.  Add the applesauce and vanilla and then stir to combine.

5. With the mixer on medium speed, gradually add the eggs, making sure to scrape down the sides and bottom of the bowl between additions. Once all of the eggs are combined, beat the mixture for about a minute on medium speed.

6. With the mixer on low speed, gradually add the flour mixture.

7. Fold in the carrots.

8. Evenly divide the cake batter between the three prepared pans (about 20 ounces of batter in each). Bake for 25 to 27 minutes, or until a toothpick inserted in the center comes out with a few moist crumbs on it. You can make cupcakes also I got 30 and baked for about 20 minutes.

9. Let the cake layers cool in the pans on cooling racks for about 10 to 15 minutes. Invert the cake layers onto the cooling racks to cool completely.

10. Level cake layers, if needed.

*Cake layers can be made ahead of time. To store: let cake layers cool to room temperature and then wrap well with plastic wrap and freeze. Before you decorate your frozen cake layers, let them thaw at room temperature for about 30 to 60 minutes prior to decorating.

FOR THE BUTTERCREAM

1. In the bowl of an electric mixer, combine the butter and cream cheese. Beat on medium speed for about two minutes. Scrape down the sides and bottom of the bowl.

2. With the mixer on low speed, gradually add the powdered sugar, followed by the cream, vanilla and pinch of salt.

3. Turn the mixer up to medium-high speed and beat for about 3 to 5 minutes.

ASSEMBLY

1. Place the first cake layer, top side up, on a cake plate or cake board.

2. Evenly spread about 1 cup of buttercream on the cake layer. Place the second cake layer on top of the buttercream and spread another 1 cup of buttercream over the second layer.

3. Place the third cake layer top side down.

4. Apply a thin layer of buttercream over the entire cake. This is the crumb coat. Freeze the crumb coated cake for about 15 minutes to set the crumb coat.

5.Once the crumb coat is set, continue decorating the cake with the remaining buttercream. Top with crushed pecans if desired.


from Cake by Courtney

November 20, 2021

Peanut Butter Cup Gooey Cookie Bars


1 cup unsalted butter, melted
3/4 cup granulated sugar
1 cup light brown sugar, packed
2 large eggs
1 TBS pure vanilla extract
1 tsp baking soda
1/2 tsp salt
3- 1/4 cups all-purpose flour
3/4 cup chocolate chips
30 Miniature Peanut Butter Cups see note
1 14 ounce can fat-free or regular sweetened condensed milk
1/4 cup creamy peanut butter


1. Preheat oven to 350°F. Line a 9×13” baking pan with foil and spray with cooking spray for easy removal.

2. Stir together melted butter with both sugars. Add eggs, one at a time, mixing completely. Mix in vanilla extract, salt, and baking soda. Mix flour in slowly. Stir in chocolate chips.

3. Pour the sweetened condensed milk into a small bowl and add the peanut butter. Stir until smooth. Set aside.


4. Press half the cookie dough in the prepared pan. (Spray your hands with nonstick cooking spray so it won’t stick to you.) Top the dough with peanut butter cups.

5. Pour sweetened condensed milk mixture over the top of the bottom layer (be careful to leave about 1/4” edge around the pan so the milk doesn’t touch the foil), then break up the remaining cookie dough and place on top of milk mixture. Press with your hands to flatten. It will mostly cover but not completely cover the bottom layer.

6. Bake for about 30-35 minutes until the tops of the bars just start to get golden brown. Cool completely before slicing into bars.

7.Store in an airtight container for up to 3 days or freeze for up to one month. These are best served room temperature.


November 19, 2021

Peanut Butter Pretzel Caramel Chocolate Bars


CHOCOLATE SHORTBREAD:
1-1/4 cups all-purpose flour
2/3 cup powdered sugar
1/3 cup natural unsweetened or Dutch-process cocoa powder
1/4 tsp salt
1 cup (8 ounces, 16 tablespoons) butter, melted (I use salted)

CARAMEL LAYER:
14 ounces soft caramels, unwrapped (Trader Joe's, Brach's etc)
1/4 cup heavy cream
1-1/2 cups (4 to 4.5 ounces) lightly crushed or broken pretzel sticks

PEANUT BUTTER LAYER:
1 cup creamy peanut butter (see note)
1/4 cup (4 TBS) butter, softened
3/4 cup powdered sugar
1/2 tsp vanilla

CHOCOLATE GANACHE:
2 cups (12 ounces) semisweet chocolate chips
1 cup heavy cream

INSTRUCTIONS
1. For the shortbread layer: preheat the oven to 350℉. Lightly grease a 9X13-inch baking pan (can also line with parchment paper). Set aside.

2. In a medium bowl, whisk together the flour, powdered sugar, cocoa powder, and salt. Stir in the melted butter until a soft dough forms. Bake for 10-12 minutes until set (I like the crust slightly under baked so it's not dry and crumbly). Cool completely.

3. For the pretzel caramel layer: in a microwave-safe bowl, combine the caramels and cream and microwave in 1-minute intervals, stirring in between, until smooth and melted. Option 1: spread caramel over the cooled chocolate shortbread layer and sprinkle with crushed pretzels. Option 2: stir the pretzels into the warm caramel and dollop across chocolate shortbread layer, pressing into an even layer with greased hands.

3. For the peanut butter layer: in a medium bowl, combine the peanut butter, butter, powdered sugar, and vainlla, and beat with an electric mixer until creamy and fluffy, 1-2 minutes, scraping down the sides of the bowl as needed. Spread over the pretzel caramel layer. Refrigerate while making the chocolate ganache.

4. For the chocolate ganache: add the chocolate chips to a medium bowl. Microwave or heat the cream on the stovetop until just below a simmer. Pour the cream over the chocolate. Let sit for 2-3 minutes. Stir to combine until glossy and smooth. Let cool for a few minutes until no longer warm. Spread over the peanut butter layer. 

5. Refrigerate the bars until set, at least 20 minutes but up to 24 hours. If refrigerated longer than an hour or so, take the bars out 15-20 minutes before cutting and serving so the caramel layer softens just a bit.


November 18, 2021

Peanut Butter Fudge Brownies


18 tablespoons unsalted butter, cut into tablespoon-sized pieces
¾ cup semisweet chocolate chips
¾ cup natural cocoa powder
1-½ cup sugar
¾ cup brown sugar packed
3 large eggs + 1 egg yolk
1 tsp vanilla extract
½ tsp salt
1- ½ cup all-purpose flour

Peanut Butter Fudge
2 cups white chocolate chips*
1 can (14 oz) sweetened condensed milk
½ cup peanut butter
¼ tsp vanilla extract
⅛ tsp salt

1. Preheat oven to 350°F and spray a 13x9 pan with baking spray.

2.  Combine butter and chocolate chips in a large, microwave-safe bowl.
Microwave for 30 seconds. Stir well, microwave for another 15 seconds and then stir well again. Repeat for 15 seconds until chocolate and butter are completely melted and well-combined.

3. Add cocoa powder and stir well. Add sugars, stir until completely combined.

4. Add eggs and then egg yolk, one at a time, stirring well after each addition

5. Add vanilla extract and salt, mix to combine. Add flour, stir until completely combined.

6. Spread approximately ½ of the batter evenly into prepared pan and make your peanut butter fudge.

Fudge

7. Combine white chocolate chips, sweetened condensed milk, and peanut butter in a medium-sized saucepan over medium-low heat.

8. Stir frequently until white chocolate chips are melted and mixture is smooth.

9. Remove from heat, stir in vanilla extract and salt, and pour evenly over brownie batter in pan, use a spatula to spread evenly, if necessary.

10. Allow to set for about 5 minutes, and then spread the remaining batter over the fudge, doing your best to cover completely with brownie batter.

11. Bake on 350°F for 40-50 minutes, use a toothpick to check for doneness at 40 minutes (toothpick should come out with few fudgy moist crumbs, but not wet batter).

12. Allow to cool completely before cutting and serving. The longer you allow the brownies to set the firmer the fudge will become.

Recipe Notes
*For a stronger peanut butter flavor, you may use peanut butter chips instead and omit the actual peanut butter. 

November 17, 2021

Cream Puffs


Puffs:

1 cup water
1/2 cup butter or margarine
1 cup all-purpose flour
4 eggs

Instructions:

1. Heat oven to 400°F.  In 2 1/2-quart saucepan, heat water and butter to rolling boil. Stir in flour; reduce heat to low. Stir vigorously over low heat about 1 minute or until mixture forms a ball; remove from heat. Beat in eggs, all at once; continue beating until smooth.

2. On ungreased cookie sheet, drop dough by slightly less than 1/4 cupfuls about 3 inches apart. Bake 35 to 40 minutes or until puffed and golden. Cool away from draft, about 30 minutes.

3.  Make a filling. I like this filling recipe or use pudding in them. Cut off top third of each puff and pull out any strands of soft dough. Fill puffs with filling; replace tops. Can drizzle melted chocolate on top or sprinkle powdered sugar if desired. After putting in filling I also topped with this whipped cream before putting on puff lid.

4. Cover; refrigerate until serving. Store covered in refrigerator. 

*A little puff pointer: Make sure the cooked dough is still warm when you drop it onto the cookie sheet. Not to worry, it’s supposed to be a little sticky and paste-like.

 from Betty Crocker.com

November 16, 2021

Classic White Bread


3/4 Cup Cane sugar
3 cups warm water (baby bottle temperature)
1- 1/2 TBS active dry yeast
1/3 cup coconut oil, melted
1 egg, beaten
1 TBS salt
7- 1/2 to 8-1/2 cups bread flour

DIRECTIONS:

1. Combine sugar, warm water, and yeast in a large mixing bowl. (Or a Bosch mixer is perfect for this recipe)

2. Let stand for 10 minutes while the yeast proofs and dissolves.

3. Add oil, egg, and salt into yeast mixture. Mix to combine.

4. Add the flour, one cup at a time, mixing well and kneading well in between. Don’t add all the flour at once, especially towards the end. How much flour you need depends on lots of variables- you don’t want dough that’s too dry. It needs to be elastic and slightly sticky, but not so wet that it leaves moisture at the side of the bowl.

5. Knead for 5 min by hand or 2-3 minutes in a mixer.

6. Cover the dough with a clean dish towel and allow it to rise until doubled, about 45 min. Then punch down. Allow it to rise for a 2nd time, covered, for 30-45 min.

7. Separate dough into 3 equal sections, or for mini loaves separate each of those 3rds into 3rds again (9 total) and with a rolling pin, roll into sections into a rectangle. With each section, roll it from bottom to top and put seam side down into a greased mini loaf pan. (Or if making 3 larger loaves, use a 4.5×8.5 inch loaf pan). Cover with a towel and let rise 30 minutes or until doubled.*

8. Bake at 375°F for 20 minutes for mini’s, or about 24 minutes for larger loaves. Take out of loaf pans, let cool on a wire rack for at least 30 minutes before slicing.

*If you want you can add things in before you roll up the dough like cinnamon/sugar, or shredded cheese, garlic butter etc 

November 15, 2021

Scotcheroo Cake


Ingredients

FOR THE CARAMEL PEANUT BUTTER CAKE

3 cups all-purpose flour
1 TBS baking powder
1 tsp salt
1 cup unsalted butter at room temperature
2 cups granulated sugar
3/4 cup smooth peanut butter
1/2 cup dulce de leche (from the can)
5 large eggs at room temperature
1 TBS vanilla extract
1- 1/4 cups whole milk, at room temperature

FOR THE CHOCOLATE BUTTERSCOTCH BUTTERCREAM

1/2 cup  heavy whipping cream
7 oz  semi-sweet or dark chocolate chips
8 oz butterscotch chips
3 cups unsalted butter slightly cold
8 cups powdered sugar, measured and then sifted
2 tsp vanilla extract
1 tsp salt
*This buttercream makes enough to fill, frost and decorate the cake with piping.

FOR THE SCOTCHEROOS (optional)
1 recipe scotheroos (any you like)  Recipe Here or  RECIPE HERE

Instructions

FOR THE CAKE

1.  PREHEAT YOUR OVEN: Preheat your oven to 325℉. Spray three 8-inch cake pans with nonstick spray, line the bottom with parchment paper and spray again. Set aside.

2. MIX THE INGREDIENTS: In a medium size mixing bowl, whisk together the flour, baking powder, and salt. Set aside.

3. In the bowl of a stand mixer fitted with the paddle attachment, combine the butter and the sugar. Mix on medium-high for about 3 to 5 minutes, until the mixture is light and fluffy.

4. Add the peanut butter and dulce de leche and continue to beat for an additional 2 minutes, until the mixture is smooth and silky.

5. Add the eggs, one at a time, scraping down the sides and bottom of the bowl to make sure all of the butter and sugar are mixed well with the eggs. Add the vanilla. Turn the mixer to medium-high and beat an additional 2 to 3 minutes.

6. With the mixer on low speed, alternately add the dry ingredients and the milk, starting and ending with the dry mixture. Mix until just combined.

7. BAKE THE CAKES: Pour the batter into your three 8-inch pans (about 22 ounces in each) and bake until a toothpick inserted in the center of the cake comes out with a few moist crumbs on it, about 25 to 30 minutes.

8. Allow the cakes to cool in the pan on wire racks for about 10 to 15 minutes and then invert onto wire racks (TIP: spray the racks with non stick spray) and allow to cool completely.

9. TIP: Cakes can be made ahead of time and wrapped in plastic wrap and frozen until ready to use. Be sure to give the cakes about 30 to 60 minutes at room temperature before stacking and decorating.

FOR THE CHOCOLATE BUTTERSCOTCH BUTTERCREAM

1. MAKE A GANACHE: Combine the chocolate chips and butterscotch chips in a mixing bowl. Set aside. In a separate microwave safe bowl, heat the cream to nearly boiling.

2. Pour the hot cream over the chips and stir until the mixture is smooth. Set aside.

3. In a stand mixer fitted with the paddle attachment, beat the butter for 2 minutes.

4. Slowly add the ganache and stir until the mixture is smooth.

5. With the mixer on low, gradually add the powdered sugar, followed by the vanilla and salt.

6. Turn the mixer to medium-high and beat the buttercream for an additional 3 to 5 minutes.

ASSEMBLY

1. STACK THE CAKE: Place the first cake layer in the center of the cake board. Using an offset icing spatula, spread about 1 cup of the buttercream evenly across the cake layer. Sprinkle chopped scotcheroos (if using) over the buttercream and pat into place.

2. Place the second cake layer on top of the filling and repeat first step.

3. Place the third cake layer, top side down.

4. Crumb coat the entire cake with a thin layer of buttercream and freeze for about 10 to 15 minutes to set.

5. Once the crumb coat is set, continue to frost the cake with the remaining buttercream. Top with Scotcheroo pieces if desired.

from Cake by Courtney

November 12, 2021

Raspberry Cheese Pie Cake


Ingredients

FOR THE GRAHAM CRACKER CRUST

25 graham crackers, full rectangle cracker
3/4 cup unsalted butter melted (I use salted)
1/2 cup  granulated sugar

FOR THE CREAM CHEESE CAKE
3 cups  all-purpose flour
3 tsp  baking powder
1 tsp salt
1 cup grapeseed oil (I used canola or vegetable)
8 ounces cream cheese, room temperature
1- 3/4 cups granulated sugar
3 eggs, room temperature

1 cup buttermilk at room temperature

FOR THE CHEESECAKE FILLING
8 oz cream cheese
14 oz sweetened condensed milk (1 can)
1/3 cup freshly squeezed lemon juice

FOR THE RASPBERRY PIE FILLING
15 oz raspberries (fresh or frozen)
1/2 cup water
1/2 cup granulated sugar
2 TBS corn starch

1 TBS lemon juice

FOR THE GRAHAM CRACKER BUTTERCREAM
2 cups unsalted butter slightly cold
5-1/2 cups powdered sugar measured then sifted
1/2 cup graham crackers, finely ground (about 7 whole crackers)
1/2 cup heavy whipping cream
1 tsp  vanilla extract
pinch of salt
*This buttercream recipe makes enough to fill and cover your cake. If you want to add additional piping, you'll want to make an extra 1/4 to 1/2 batch.

Instructions:

FOR THE GRAHAM CRACKER CRUST

1.  Preheat the oven to 375℉. Spray three 8-inch cake pans with nonstick spray, line with parchment, and spray again. Set aside.

2. In a food processor or blender combine the graham cracker, sugar and melted butter. Pulse until the mixture resembles wet sand.

3. Divide the crumbs between the three pans (about 7 ounces in each). Pat firmly into place.

4. Bake the crusts for 5 minutes.

FOR THE CREAM CHEESE CAKE

1. Preheat your oven to 325℉ degrees.

2. In a medium mixing bowl, whisk together the flour, baking powder and salt. Set aside.

3. In the bowl of a stand mixer, beat the grapeseed oil, cream cheese and sugar on medium-high speed for 2-3 minutes.

4. With the mixer on medium, add the eggs, one at a time, making sure to scrape down the sides and bottom of the bowl between each addition. Once all of the eggs are added, turn the mixer to medium-high speed and beat for an additional 2 minutes.

5. With the mixer on low, alternately add the flour mixture and the buttermilk in three additions, starting and finishing with the flour. Combine until incorporated, about 20 to 30 seconds.

6. Evenly distribute the batter among the three cake pans on top of the crusts (about 15-16 ounces of batter in each pan) and bake for 30 to 35 minutes or until a toothpick inserted in the center of the cake comes out with just a few moist crumbs.

7. Let cool in pans 5-10 minutes before inverting onto a wire rack to cool completely. Once cooled, you can cover with plastic wrap and store in your refrigerator overnight or freezer for longer.

FOR THE CHEESECAKE FILLING

1. In a medium size mixing bowl, beat the cream cheese, sweetened condensed milk, and lemon juice until smooth.

2. Cover and refrigerate until ready to use.

FOR THE RASPBERRY PIE FILLING

1.  Combine all of the ingredients in a medium saucepan. Heat to a boil. Boil for 5 minutes, stirring occasionally. You want the raspberries to soften and the liquid to thicken. It should coat your spoon well.

2. This is best made ahead of time and can be stored in an airtight container in the refrigerator for a couple weeks.

FOR THE GRAHAM CRACKER BUTTERCREAM

1. In a stand mixer fitted with a paddle attachment, beat the butter on medium-high speed for about two minutes.

2. With the mixer on low speed, slowly add the sifted powdered sugar until incorporated. Scrape down the sides of the bowl and continue to mix for another minute.

3. Add the graham cracker crumbs, heavy cream, vanilla and salt. Increase the speed to medium-high and beat the buttercream for 3 to 5 minutes.

4. Use a spoon to mix the frosting by hand, which will push out the air pockets created by the electric mixer.

ASSEMBLY


1. Place the first cake layer, top side up, on a cake board or cake plate. Using a piping bag, pipe a rim of buttercream around the edge of the cake.

2. Fill the cake with 1/2 cup cheesecake filling, followed by 1/2 cup raspberry compote.

3. Place the second cake layer on top and repeat step two.

4. Place the final cake layer on top and apply a thin layer of buttercream around the entire cake. Freeze the cake for about 10 minutes to set crumb coat.

5. Finish frosting the cake with the remaining buttercream and top with remaining cheesecake filling and raspberry compote.

(For cupcakes I put the graham cracker crust in the bottom of the cupcake liners and baked for 5 minutes.  Then add the cake batter and bake the cupcakes.  To assemble I put the cheesecake filling in a bag and squeezed into the cupcake. Then I did a ring of the graham cracker buttercream around the edge and put the raspberry compote in the middle.)


November 11, 2021

Instant Pot Potato Soup


3 pounds russet potatoes, peeled and diced into 1/2" cubes
1 medium yellow onion, diced
48 ounces chicken broth
½ tsp garlic powder
½ tsp seasoned salt
½ tsp pepper
pinch of parsley
⅓ cup flour
2 cups heavy whipping cream, divided
1 cup grated parmesan cheese
12 strips bacon cooked and crumbled
2 TBS fresh minced parsley

INSTRUCTIONS

1.  In a 6-quart instant pot (or pressure cooker), place potatoes, onion, chicken broth, garlic powder, seasoned salt, pepper, and parsley. Lock lid, make sure vent is closed. Using the manual setting, on high pressure, set time for 15 minutes. When finished cooking, quick-release pressure.

2.  In a small bowl, mix together 1/3 cup flour and 1/2 cup cream until smooth. Switch the setting on your Instant Pot to saute, and adjust the heat to low, then mix in flour and cream mixture. 

3.  Stir in 3/4 cup cheese, bacon, and remaining cream. Stir for 6-8 minutes until the soup starts to thicken. 

4. Top each individual serving of soup with a sprinkle of parmesan cheese and sprinkle of fresh parsley.

from Six Sister's Stuff

November 10, 2021

Peanut Butter Pie


Ingredients

FOR THE CRUST
1 cup crushed pretzels
9 graham crackers full rectangles
1/2 cup unsalted butter, melted
1/4 cup granulated sugar

FOR THE FILLING
8 oz cream cheese
1 cup peanut butter smooth
1 cup heavy whipping cream
1/2 cup powdered sugar
1 tsp vanilla extract

FOR THE CARAMEL
1/2 cup granulated sugar
4 TBS water
2 tsp light corn syrup
3/4 cup heavy whipping cream
1 tsp vanilla extract
1 tsp salt

Garnish
Salted peanuts
Chocolate peanut butter cups
crushed pretzels

Instructions:

For the Crust

1.  Preheat your oven to 400℉. Spray an 8-inch pie pan with nonstick spray and set aside.*

2.  In a food processor, combine the pretzels, graham cracker crumbs, melted butter and granulated sugar. Pulse until the mixture resembles "wet sand."

3.  Firmly press the crust into the pie pan, pushing it up against the sides a bit.

4.  Bake the crust for 7 minutes and then remove from oven to cool completely before assembly.


For the Filling

5.  In a medium size bowl, combine the peanut butter and cream cheese and mix until combined. Mixture will be slightly thick. Set aside.

6. In a stainless steel bowl, beat the whipping cream, powdered sugar and vanilla on medium-high speed until still peaks form.

7. Fold the whipped cream into the peanut butter mixture until smooth.

For the Caramel

8. Mix sugar, water and corn syrup in a small saucepan.

9. Bring the water and sugar mixture to boil over medium heat, but DO NOT STIR. (Stirring encourages crystallization). Let the mixture cook until it caramelizes into a golden brown color. It happens quickly, so keep an eye on it.

10. Remove the caramelized sugar syrup from the heat and slowly mix in the cream. Pour in just a tiny bit at a time, especially at the beginning, and mix to combine. You can start adding more and more as you go along.

11. Mix in salt and vanilla. Stir to combine. Let cool to room temperature.

Assembly

12. Once the crust is cooled completely, pour about 3/4 of the caramel onto the crust and spread on the bottom and the sides with the back of a spoon.

13. Pour all of the filling into the pie pan, on top of the caramel, and spread evenly.

14. Sprinkle the top with peanuts, chocolate peanut butter cups and the remaining caramel.

* The pan was very full, Next time I will divide in 2 and make 2 smaller pies or use a deep dish pan.

November 9, 2021

Maple Brown Sugar Cookies


2-1/3 cups all-purpose flour (spooned and leveled)
1 tsp baking soda
1/2 tsp salt
1/2 cup (1 stick) unsalted butter, room temperature
1 cup  packed dark brown sugar (can use light brown sugar if needed)
1 large egg, at room temperature
1/3 cup pure maple syrup (avoid breakfast syrup)
1 tsp pure vanilla extract
1 tsp maple extract
1 cup chopped pecan (optional)

Maple Icing:
2 TBS unsalted butter
1/3 cup pure maple syrup
1 cup sifted confectioners’ sugar
pinch salt, to taste


1.  Whisk the flour, baking soda, and salt together in a medium bowl. Set aside.

2.  Using a hand mixer or a stand mixer fitted with a paddle attachment, cream the butter and brown sugar together on medium speed until smooth, about 1-2 minutes. Add the egg and beat on high until combined, about 30 seconds. Scrape down the sides and bottom of the bowl as needed. Add the maple syrup, vanilla extract, and maple extract, then beat on high speed until combined.

3. Pour the dry ingredients to the wet ingredients, then mix on low until combined. Add the pecans, then beat on low speed until combined. Dough will be creamy and soft.

4. Cover and chill the dough for 2 hours in the refrigerator (and up to 3-4 days). If chilling for longer than a few hours, though, allow to sit at room temperature for at least 30 minutes before rolling and baking because the dough will be quite hard.

5.  Preheat oven to 350°F. Line 2-3 large baking sheets with parchment paper or silicone baking mats. Set aside.

6.  Roll cookie dough into balls, about 1.5 Tablespoons of dough per cookie. Bake each batch for 12-13 minutes until lightly browned on the sides. The centers will look very soft. (mine only took about 8 minutes)

7.  Remove from the oven. If your warm cookies look puffy, lightly bang the pan on the counter when you remove it from the oven. That will help slightly deflate the cookies, creating cracks. Cool cookies on the baking sheets for 5 minutes before transferring to a wire rack to cool completely.

8.  Make the icing: In a small saucepan over low heat, melt the butter and maple syrup together, whisking occasionally. Once the butter has melted, remove from heat and whisk in the sifted confectioners’ sugar. Taste. Add a pinch of salt, if desired. Drizzle over cooled cookies. Icing will set after about 1 hour.
Cookies stay fresh covered at room temperature for up to 1 week.

Notes

Make Ahead Instructions: You can make the cookie dough and chill it in the refrigerator for up to 4 days. Allow to come to room temperature then continue with step 5. Baked cookies, with or without icing, freeze well for up to 3 months. Unbaked cookie dough balls freeze well for up to 3 months. Bake frozen cookie dough balls for an extra minute, no need to thaw. 


Pecans: The pecans are optional, but add wonderful flavor and texture. I recommend unsalted, un-roasted pecans but feel free to use salted roasted pecans. Or feel free to leave them out or replace with chopped walnuts.

Confectioners’ Sugar: To avoid any lumps,  sift the confectioners’ sugar.

from Sally's Baking Addiction


November 8, 2021

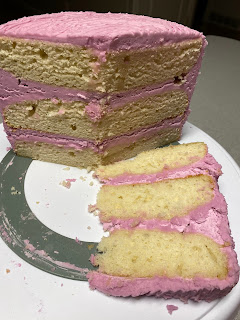
Classic Vanilla Cake


FOR THE CAKE
1 cup unsalted butter, room temperature (I use salted)
1 3/4 cups granulated sugar
6 large egg whites, room temperature
1 TBS vanilla bean paste or pure vanilla extract
1/2 cup sour cream, room temperature
3 cups cake flour
1 TBS baking powder
1 tsp. salt
1 cup buttermilk, room temperature

FOR THE BUTTERCREAM
2 cups unsalted butter, slightly cold (I use salted)
6 cups powdered sugar measured and then sifted
1/4 cup heavy cream, cold
1 tsp vanilla bean paste
pinch of salt
*This buttercream recipe makes enough to fill and cover your cake. If you want to add additional piping, you’ll want to make an extra 1/2 batch.
*I added a little food coloring

Instructions

FOR THE CAKE

1.  Preheat your oven to 325℉. Spray three 8-inch or four 6-inch round cake pans with non-stick spray and then line with parchment. Spray again. Set aside.

2. In a medium sized mixing bowl, whisk together the cake flour, baking powder and salt. Set aside.

3. In the bowl of an electric mixer, fitted with the paddle attachment, cream the butter and the sugar for 3 to 5 minutes on medium-high speed. The mixture should be light and fluffy.

4. Scrape down the sides of the bowl and begin to add the egg whites on medium speed, scraping down the sides and bottom of the bowl between addition.

5. Add the vanilla bean paste or extract and beat until incorporated.

6. With the mixer on low speed, add 1/3 of the flour mixture, followed by 1/2 cup of the buttermilk. Repeat the additions, 1/3 cup flour mixture, 1/2 cup buttermilk and the final 1/3 cup flour mixture. Only mix until the flour mixture is incorporated, about 30 seconds. Scrape down the sides and bottom of the bowl and mix again for another 20 to 30 seconds on low. Fold in the sour cream.

7. Pour about 16 ounces of cake batter into each of the three 8-inch cake pans or 12 ounces in each of the 6-inch pans and bake for 25 to 28 minutes, or until a toothpick inserted into the center of the cake comes out with a few moist crumbs on it. Let cool in the pans for about 15 minutes and then invert onto a wire rack to cool completely. (Tip: spray your wire cooling racks with nonstick spray).

FOR THE BUTTERCREAM

1. In the bowl of an electric mixer, fitted with the paddle attachment, beat the butter for about 2 minutes, until light and fluffy and pale in color.

2. With the mixer on slow, gradually add the powdered sugar, followed by the heavy cream, vanilla, and pinch of salt.

3. Once all of the ingredients are combined, turn the mixer to medium-high and beat for about 3 to 5 minutes. Scrape down the sides of the bowl and beat for a couple minutes more.

4.  Before using the buttercream, make sure to beat it by hand with a wooden spoon or large spatula to help push out the air pockets.

ASSEMBLY

1. Place the first cake layer top side up, in the center of the cake board.

2. Spread about 1 cup of the the buttercream over the cake layer.

3. Place the second cake layer on top of the buttercream and spread more buttercream across the layer.

4. Place the final cake layer top side down on the buttercream.

5. Apply a thin layer of buttercream around the entire cake. Freeze the cake for 10 minutes. This is your crumb coat.

6. Once the crumb coat is set, continue frosting the cake with the remaining buttercream.


November 5, 2021

Chocolate Heath Cake Cookies


 Cookies:

1-1/2 cups salted butter softened
1-1/2 cups brown sugar
1/2 cup granulated sugar
3 eggs
2 TBS corn syrup
1 TBS + 1/2 tsp vanilla extract divided
3-3/4 cup all purpose flour
1 cup dutch processed cocoa powder
1 TBS cornstarch
2 tsp baking soda
1 tsp salt

Toppings:

1 can sweetened condensed milk
2 cups heavy cream
1 cup powdered sugar
1 tsp vanilla extract
3/4 cup heath bits

Instructions

1.  Preheat the oven to 350°F.

2.  Using a stand mixer, cream together the butter and sugars until light in color and fluffy in texture.
Add in the eggs, corn syrup and 1 TBS of vanilla. Mix until thoroughly combined.

3.  Next, add the flour, cocoa, cornstarch baking soda and salt. Mix until your chocolate cookie dough forms. The dough will be soft.

4.  Divide the dough out into 12 equal portions, Use a 1/2 cup measuring cup to help divide the dough. You'll want to use a little less than 1/2 cup of dough to have 12 cookies. (I prefer to use 1/3 cup for a slightly smaller cookie)

5.  Roll each portion onto a ball then flatten slightly so it looks like a hockey puck before arranging on a parchment paper or silicone mat covered pan. Place 6 cookies per tray. Bake at 350°F for 15-17 minutes. (I baked the 1/3 cup dough ball size for 10 minutes.  I got 16 cookies) The cookie should start to crack and crinkle, it will spread slightly and the centers of the cookie should no longer look wet before taking them out of the oven.

6.  Right after the cookies come out of the oven, spoon about a TBS or so of sweetened condensed milk onto each cookie. It will drip down the sides, which is why we wanted a silicone mat or parchment paper! Just let that cookie soak up the sweetened condensed milk.

7.  Repeat with each cookie and then allow the cookie to cool completely.

8.  Once the cookies are cool, make the frosting. 

9.  Make the frosting by adding the heavy whipping cream to either the bowl of your stand mixer or a large bowl that you can use an electric hand mixer with.

10.  Whip the cream on medium high speed until it starts to thicken.

11.  Once it starts to thicken, slow the speed down and gradually add in the powdered sugar and vanilla. Once all of the powdered sugar has been added bump the speed up to as high as it can go and whip it until stiff peaks form. Once stiff peaks form, the frosting is done!

12.  Add the frosting to a piping bag with a large closed star tip. Zig zag the frosting across the cookies from side to side to cover the top of the cookie and then sprinkle the heath bits on top.
Repeat with all of the cookies and then chill in the fridge for 30 minutes before serving.

Serve chilled and store in the refrigerator.
Cookies store really well in the fridge and can be made a few days in advance if needed.

from Cooking With Karli


November 4, 2021

Salted Caramel Cheesecake Cookies


Graham Cracker Cookie: 

1-1/2 cups salted butter softened
3/4 cup granulated sugar
1-1/2 cups packed brown sugar
2 eggs
1 TBS vanilla
3-3/4 cups all purpose flour
2 pkg graham crackers, crushed (appproximately 2 -1/2 cups of crumbs)
2 tsp baking soda
1 tsp baking powder
1 tsp salt

Cheesecake Frosting and Drizzle:

16 oz cream cheese room temperature
7 oz marshmallow creme
2 cups powdered sugar
1/3 cup caramel dip (any kind you like) I used this Caramel Sauce
coarse sea salt

Instructions:

1.  Preheat oven to 350°F.

2.  Cream together the butter, granulated sugar and brown sugar.

3.  Add the egg and vanilla. Mix until light in color and creamy.

4.  Add in the dry ingredients (flour, crushed graham crackers, baking soda, baking powder and salt), mix into the dough. Mix until completely combined.

5.  Portion out the dough into 1/2 cup portions. Roll into a ball and arrange 6 onto each cookie sheet. Press down slightly on the cookie dough, flattening it until it is abotu 1 inch thick. (I prefer to make 1/3 cup size dough ball and I baked for about 10 minutes.  I got 18 cookies)

6.  Bake for 12-15 minutes, until the cookies are turning golden brown.

7.  Allow the cookies to cool on the pan for 5 minutes before transfering to a wire rack.

8.  While the cookies are cooling, make the frosting by whipping the cream cheese until smooth.
Add the powdered sugar 1/2 cup at a time, mixing until completely combined before adding more powdered sugar. Repeat until the full 2 cups of powdered sugar have been added. 

9.  Add in the marshmallow cream and mix until all of it has been combined thoroughly.

10. Add the frosting to a gallon sized zip top bag, cut the corner of the bag and use it to pipe the frosting onto the warm cookies in a spiral.

11.  Add the caramel dip to a small zip top bag and cut the corner and zig zag the caramel over top of the frosting and then sprinkle with sea salt. Serve warm or cold.

from Cooking with Karli

Pumpkin Chocolate Chip Cookies


Pumpkin Chocolate Chip Cookies


3/4 cup canola oil
1-3/4 cup granulated sugar
1-1/2 TBS vanilla extract
1 1/2 cups pumpkin puree
2 eggs
2- 3/4 cup all purpose flour
3 tsp baking powder
1 tsp baking soda
1-1/2 tsp salt
3 tsp ground cinnamon
2 cups semi sweet chocolate chips

1.  Preheat oven to 375°F.

2.  In a large bowl, whisk together the oil, sugar, vanilla pumpkin and eggs.

3.  Using a wooden spoon, add in the flour, baking powder, baking soda, salt and cinnamon.  Mix until thoroughly combined. It will be more of a batter than cookie dough. Similar to a thick pancake mix.

4.  Fold in the chocolate chips.

5.  Scoop out a little less than 1/2 cup of batter and gently spoon it onto a silicone baking mat lined cookie sheet. Place 6 cookies on each pan, you should be able to make 12 cookies.

6.  Bake at 375° F for 15-17 minutes. The cookies will spread quite a bit, turn a nice golden color and will bounce back when tapped in the center of the cookie when they are ready to come out of the oven.

7.  Allow the cookies to cool on the pan for 15-20 minutes before transferring.
Can Serve warm.

If you make smaller adjust baking time.

from Cooking with Karli

November 3, 2021

Crumbl Chocolate Chip Cookie Copy Cat


1-1/2 cups butter softened
3/4 cup granulated sugar
1-1/2 cup brown sugar
2 eggs
1-1/2 TBS vanilla
4-1/4 cups all purpose flour
2 tsp baking soda
1 tsp baking powder
1 tsp salt
2 cups guittard milk chocolate chips

Instructions

1.  Preheat oven to 375°.

2.  Cream together the butter, granulated sugar and brown sugar.

3.  Add the egg and vanilla. Mix until light in color and creamy.

4.  Add in the dry ingredients (flour, baking soda, baking powder and salt), mix into the dough. Mix until completely combined.

5.  Fold in the chocolate chips.

6.  Portion out the dough into 1/2 cup portions. Roll into a ball and arrange 6 onto each cookie sheet. Add extra chocolate chips to the top if desired.

7.  Bake for 12-15 minutes, until the cookies are turning golden brown.

8.  Allow the cookies to cool on the pan for 20 minutes before serving or transferring to a wire rack.

If you make the cookies smaller make sure to adjust baking time.


November 2, 2021

Pumpkin Chocolate Chip Bars


2-⅓ cups all-purpose flour
1 TBS pumpkin pie spice
1 tsp cinnamon
1 tsp baking soda
½ tsp salt
½ cup (1 stick) butter, softened
½ cup unsweetened applesauce
¾ cup granulated sugar
¾ cup light brown sugar
1 large egg
2 tsp vanilla extract
1 can (15 oz) pure pumpkin
2 cups milk chocolate chips

Instructions

1.  Preheat oven to 350°. Line a 9x13-inch baking pan with foil or parchment paper leaving an overhang on each long side so the bars can be easily pulled out of the pan to cut. Or just spray the pan with cooking spray.

2.  In a small mixing bowl, whisk together flour, pumpkin pie spice, cinnamon, baking soda, and salt. Set aside.

3.  In the bowl of a stand mixer, or in a large bowl using a handheld electric mixer, cream the butter, applesauce, granulated sugar and brown sugar on medium-high speed until smooth. Beat in egg and vanilla until combined. Add pumpkin puree and mix until combined. Don't worry if the mixture looks curdled - that's completely fine!

4.  Mix in the dry ingredients, beating just until combined. Fold in the chocolate chips.
If desired reserve some chocolate chips to sprinkle on top of the batter before baking. This is optional and just makes for a pretty presentation.

5.  Spread the batter evenly in the prepared pan. Top with reserved chocolate chips (if wanted) and bake for 30-40 minutes. 

*The edges will begin to pull away from the sides of the pan and will be golden brown and the center will look "puffy" and done. A toothpick inserted in the middle should come out with moist/dry crumbs.

Let the bars cool for at least 30 minutes in the pan before lifting them out and cutting into squares.

* Store leftovers covered at room temperature. These bars get better, and even more moist, the longer they sit out.

 from Together As Family


August 18, 2021

Kentucky Butter Cake Cookies


Cookies:

1 cup butter, room temperature
1 cup granulated sugar
2 eggs
1 tsp vanilla
2 tsp baking powder
½ tsp salt
3 cups all purpose flour


Glaze:
1/4 cup butter
1/2 cup granulated sugar
1 TBS water
1 tsp vanilla
optional ~ powdered sugar to dust


1.  Preheat oven to 350°F.  Line a baking sheet with parchment or a silicone mat. Set aside.

2.  In the bowl of the stand mixer beat butter and sugar together for 1 minute until mixed. Add in eggs and vanilla and mix until incorporated, scraping sides as necessary.

3.  Add in baking powder and salt, continuing to mix and finally the flour. Mix until dough just comes together.

4. Using a medium (2 tablespoon) cookie scoop drop the dough onto the lined baking sheet. Alternately you can roll the dough into balls if you want a thicker cookie.

5. Bake for 9-11 minutes until the edges are slightly golden. Don’t over-bake.

Glaze
6.  While the cookies are baking combine all ingredients into a small saucepan over medium-low heat. Stir continuously until the butter is melted and the sugar is dissolved. Do not bring to a boil.

7.  Allow the glaze to cool slightly (about 5 minutes) to thicken.

8.  When the cookies are done spoon one teaspoon of the glaze onto each cookie while they’re warm. If the glaze gets too thick just heat it up a bit more.
Dust with powdered sugar after the glaze has set if desired

from Cookies and Cups


May 25, 2021

Blueberry Muffins


½ cup softened butter
1-¼ cups sugar
2 eggs
1 tsp vanilla extract
2 cups all purpose flour
1 tsp salt
2 tsp baking powder
½ cup buttermilk (can use milk if you don't have buttermilk on hand)
2 cups blueberries, washed, drained - or 2 cups frozen blueberries, thawed
3 tsp sugar

1.  Preheat the oven to 400℉.

2.  Cream the butter and 1-¼ cups sugar until light and fluffy.

3.  Add the eggs, beating well as you add each egg.

4.  Add vanilla and buttermilk, mix well.

5.  Sift in the flour, salt and baking powder, into to the creamed mixture.

6.  Mash about half of the blueberries with a fork or back of a spoon and add to mix, making sure it's evenly mixed throughout.
Fold in the remaining blueberries.

7.  Line a 6 cup jumbo muffin tin or 18 cup standard muffin tin with cupcake liners.
Fill with batter - leave ⅓ muffin tin/liner for muffins to rise above.

8.  Sprinkle the 3 teaspoons sugar over the tops of the muffins, reduce oven heat to 375, and bake at 375 degrees for about 30-35 minutes for large muffins or about 18 minutes for regular size.

Remove muffins from tin and cool at least 30 minutes.


April 21, 2021

Garlic Knots


3 cups warm water
1-1/2 TBS yeast
1/3 cup sugar
1 egg, beaten
1 TBS salt
1/3 cup melted coconut oil (or avocado oil or canola oil)
8ish cups bread flour (give or take 1/2 cup)


Topping:
6-8 TBS butter, melted
1/2 tsp salt
1/2 tsp garlic powder
1/2 tsp basil dried
1/2 tsp parsley dried
1 cup (4 oz.) freshly grated Parmesan


1.  In a large bowl or mixer combine: water, yeast and sugar.  Cover and let dissolve for 10 minutes.

2.  Then add: beaten egg, salt and melted coconut oil.  Then add 8 fish cups of bread flour.  Add flour until it the dough pulls away from the side of the bowl. The dough should be elastic and tacky but not so sticky that it heavily sticks to the palm of your hand. Do not add too much flour! 

3.  Knead for 15 min (by hand or using a mixer)

4.  Let rise 45 min or until doubled while covered with a clean dishtowel.
Divide dough in half, and divide each half into 16 portions. Form into knots or breadsticks or roll shape. 

5.  Combine topping ingredients together in a bowl.  Spread on melted butter and seasoning topping with a silicone brush.  Make sure each surface of the dough is covered by the butter or it will dry out. Let rise uncovered for an hour or until doubled. 

6.  Bake at 375°F for about 12-15 min or until golden on top.

*Recommend a high-quality unbleached bread flour such as @lehimills or @kingarthurflour  

 from Amber's Kitchen

April 15, 2021

Biscoff Cookies


18 TBS butter (2 sticks + 2 TBS)

1 cup sugar

1 cup light brown sugar, packed

2 eggs

1 TBS + 1 tsp vanilla

3 cups flour

1 tsp baking soda

3/4 tsp salt

2 cups white chocolate chips

Biscoff Cookie Butter (about 15 TBS, one 14.1 oz jar has enough)

20 Biscoff Cookies, finely crushed in food processor (if you buy the 8.8 oz bag you'll need 2 for this recipe)

20 Biscoff Cookies, coarsely broken up

1. Preheat oven to 350℉.

2. Mix butter and sugar together until creamy. Add eggs and vanilla and beat until well combined.

3. In a large bowl combine flour, ground cookies, baking soda, and salt. Slowly add to wet ingredients until well combined.

4. Add chopped cookies and white chocolate chips until combined.

5. With a large cookie scoop (about 3 TBS of dough) make two dough balls per cookie. Take one of the cookie dough balls and us the back of a TBS to make an impression in it. Then scoop 1 TBS of Cookie Butter into the impression. Take the second ball and place it on top of the ball with cookie butter in it. Seal the sides and make sure no cookie butter will leak out. Form into a ball.

6. Continue with the rest of the cookie dough (If you want smaller cookies use a small scoop and add about 1 tsp of cookie butter in the middle.)

7. Bake for about 10 minutes or until edges are golden brown. (Makes about 20 large cookies)

from kcampbell24